Introduction to Beekeeping: Why Start Beekeeping?
Thinking about how to start beekeeping? You’re in good company! Beekeeping is a growing hobby for those looking to produce their own honey, help the environment, and learn more about these fascinating creatures. Whether you’re interested in supporting local pollinators or harvesting honey for your kitchen, beekeeping offers many rewards.
Why Should You Start Beekeeping?
Here are a few reasons that make it a perfect hobby for beginners:
- Support the Environment: Bees are essential pollinators, playing a critical role in our food system by helping plants reproduce. As a beekeeper, you’re contributing to the health of local ecosystems by increasing pollinator populations.
- Harvest Your Own Honey: There’s nothing quite like enjoying honey that you’ve harvested from your own backyard. Not only is it rewarding, but home-harvested honey is free from additives and pesticides often found in commercial products.
- Learn and Connect: Beekeeping offers a unique opportunity to connect with nature and gain a deeper understanding of bees. You’ll learn how these little creatures function as a hive, working together to create honey, wax, and more.

When Should You Start Beekeeping?
The best time to start beekeeping is in early spring when flowers begin to bloom. This gives your bees time to establish their hive and collect enough nectar before the colder months. Starting in spring ensures that your colony is strong and ready to survive the winter.
How Do You Get Started?
If you’re ready to jump into beekeeping, here are the first steps:
- Research Local Regulations: Before you begin, it’s important to check your local laws about keeping bees. Some areas require permits or have restrictions on the number of hives you can have.
- Choose the Right Hive: There are a few different hive options, but for beginners, the Langstroth hive is the most popular because it’s easy to manage and expand as your colony grows.
- Start Small: It’s recommended to begin with one or two hives. This way, you can focus on learning the ropes without becoming overwhelmed.
Starting small and building your knowledge is key to becoming a successful beekeeper. It’s not only about harvesting honey but also about understanding bee behavior, maintaining their health, and managing your hive throughout the seasons.
Wondering where to place your hive or how much it might cost to get started? In the next section, we’ll dive into the basics of setting up your first beehive, the equipment you’ll need, and tips for success.
Beekeeping Basics: Preparing for Your First Hive
So, you’ve decided to take the plunge into beekeeping—what’s next? Before you get your first hive buzzing with bees, it’s crucial to prepare properly. A little upfront work will set you up for long-term success and save you headaches down the road. From choosing the right location to understanding your bees’ needs, let’s cover the essentials for setting up your first hive.
Where Should You Place Your Beehive?
One of the most important decisions you’ll make is where to place your beehive. Here are a few key factors to consider:
- Sunlight: Bees thrive in warmth. Make sure your hive gets plenty of morning sunlight to help the bees get an early start on their work. However, you might also want to offer partial shade in the afternoon to prevent overheating.
- Protection from Wind: Windy areas can make it difficult for bees to fly and may stress out your colony. Placing your hive near a natural windbreak like a fence, hedge, or building can help keep them comfortable.
- Access to Water: Bees need water to regulate the temperature of their hive and dilute honey for feeding their larvae. If you don’t have a nearby source of water, consider placing a shallow water dish near the hive, with rocks or sticks for them to land on.
Remember, the location of your hive not only affects the health of your bees but also your own experience. Make sure it’s in a spot that’s easily accessible for regular hive inspections but out of the way of daily human activity.
How Much Space Do You Need?
You don’t need acres of land to be a successful beekeeper. A small backyard or rooftop can be enough, as long as the hive has enough space around it for airflow and maintenance. Aim for at least a few feet of clearance on all sides of the hive to make inspections easier.
What Type of Hive Should You Choose?
When it comes to picking a hive, you’ll encounter a few options:
- Langstroth Hive: This is the most popular type of hive for beginners. It’s modular, meaning you can add extra boxes (called “supers”) as your colony grows. This hive is easy to inspect and harvest honey from, making it a go-to for new beekeepers.
- Top Bar Hive: If you’re looking for a more natural approach, the top bar hive allows bees to build their combs as they would in the wild. It’s simpler in design but can be more difficult to manage compared to a Langstroth.
- Warre Hive: This vertical hive design is compact and mimics the bees’ natural habitat in hollow trees. It requires less intervention, but it’s not as beginner-friendly when it comes to honey harvesting.
For most beginners, the Langstroth hive is the safest choice. Its structured frames make it easier to inspect the bees and harvest honey, and you can expand it as your colony grows.
What Else Do You Need?
Beyond the hive itself, there are a few essential tools every beekeeper should have:
- Protective Gear: A beekeeping suit with a veil will protect you from stings during hive inspections. Gloves are optional but recommended for beginners.
- Smoker: A smoker is used to calm the bees during inspections. The smoke masks alarm pheromones, helping to keep the bees relaxed.
- Hive Tool: This handy tool helps you pry apart frames and lift boxes during inspections. It’s a small but crucial piece of equipment.
Feeling ready to dive into beekeeping, but unsure about the specifics of managing your hive day-to-day? In the next section, we’ll cover what it takes to keep your bees healthy and thriving throughout the seasons.
Beekeeping Equipment: What You Need to Get Started
Starting beekeeping isn’t just about getting bees; you’ll need the right equipment to make sure both you and your bees are safe and comfortable. It might seem like a lot at first, but with the right tools, beekeeping can be a smooth, enjoyable experience. Let’s break down the essentials.
The Hive: Your Bees’ New Home
The hive is the heart of your beekeeping operation. As we’ve mentioned, the Langstroth hive is the most popular choice for beginners. It’s easy to manage, and you can expand it as your colony grows.
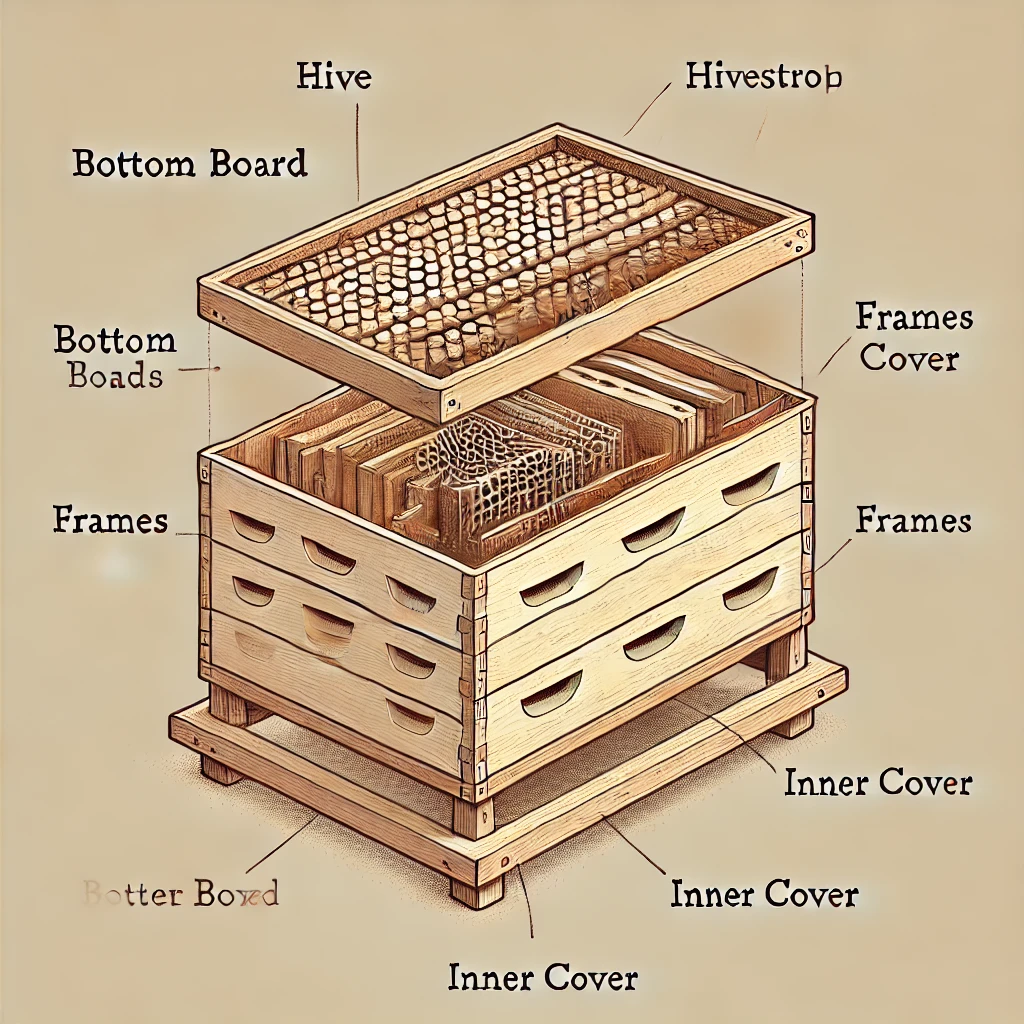
Key Parts of a Hive:
- Bottom Board: This is where your hive sits, providing a base.
- Hive Bodies (Boxes): These are the stacking boxes where bees build their comb and store honey.
- Frames: These removable pieces inside the hive boxes hold the beeswax combs where honey and brood (baby bees) are stored.
- Inner and Outer Covers: These protect the hive from weather conditions.
Each part of the hive plays a vital role in keeping your bees safe and productive. When setting up your hive, make sure everything fits together properly and is securely placed to prevent disturbances to your bees.
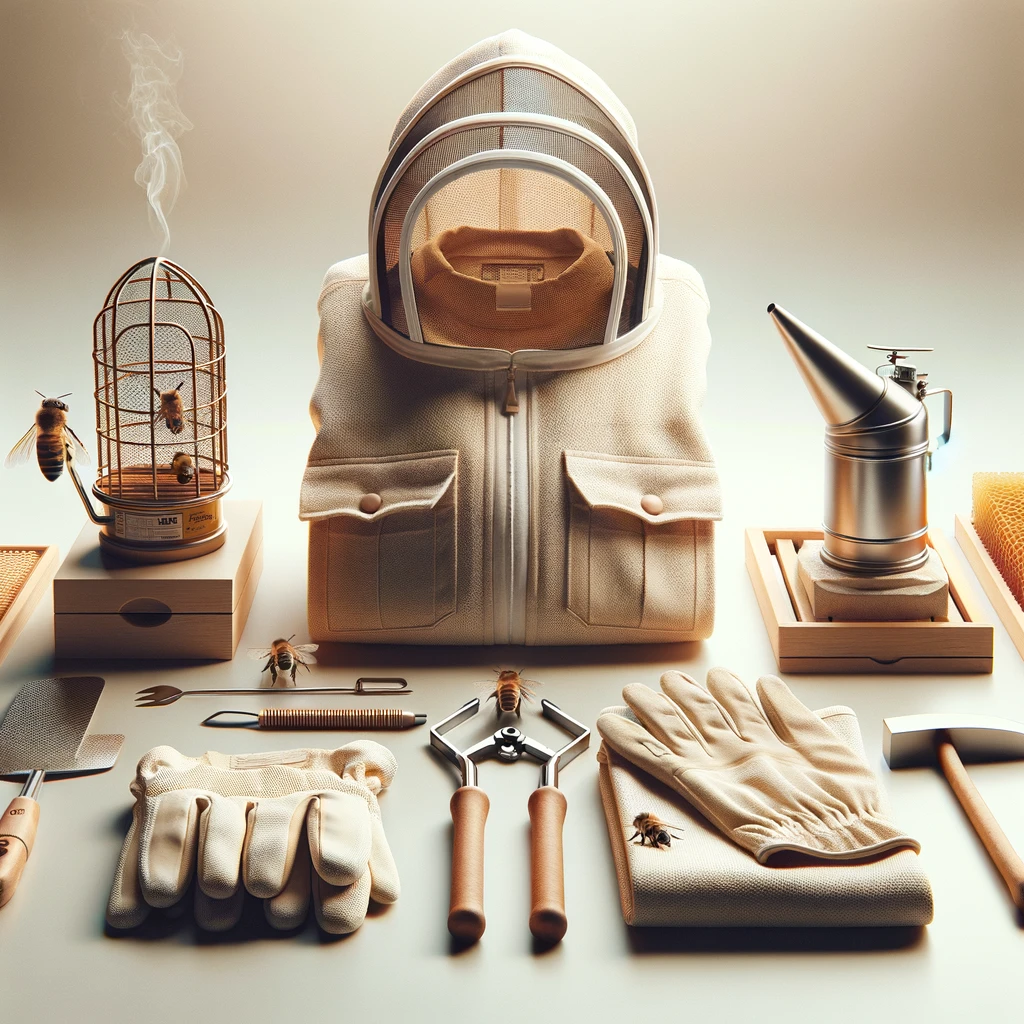
Protective Gear: Stay Safe, Stay Confident
One of the biggest concerns for beginner beekeepers is getting stung. Fortunately, with the right gear, you can reduce your chances of stings while inspecting your hive. Here’s what you need:
- Bee Suit: A full-body suit, typically white, that protects you from head to toe. Light colors are preferred because dark colors can agitate bees.
- Veil: The veil protects your face and neck, the most vulnerable spots for bee stings.
- Gloves: While some experienced beekeepers skip gloves for better dexterity, beginners should wear them until they’re more comfortable around bees.
It’s natural to be nervous around bees at first, but with time, you’ll gain confidence. Wearing protective gear can help you focus on the task at hand rather than worrying about getting stung.
The Smoker: Your Best Friend During Hive Inspections
One tool that beekeepers quickly come to rely on is the smoker. You may wonder, “Why do I need to use smoke?” Here’s the science: smoke masks the bees’ alarm pheromones, helping to keep them calm during hive inspections. Without it, the bees might feel threatened and become defensive.
- How to Use It: Light your smoker with natural materials like wood chips or pine needles. Puff a small amount of smoke into the hive entrance before opening it. Then, use it sparingly as you inspect the hive to keep the bees calm.
- Pro Tip: Always check your smoker before each inspection to ensure it’s working properly. Nothing’s worse than being mid-inspection and having your smoker go out!
Hive Tool: The Multi-Purpose Must-Have
A hive tool might look simple, but it’s one of the most important tools in your kit. Bees use a sticky substance called propolis to seal gaps in their hive, making it hard to open boxes or move frames without a tool. The hive tool helps you:
- Pry apart the boxes and frames
- Scrape away excess wax or propolis
- Lift frames for inspection
It’s a small investment, but it will make hive management much easier.
Where to Buy Beekeeping Equipment
Finding reliable, high-quality equipment is essential for getting started right. Many online beekeeping supply stores offer starter kits that include everything you need. When shopping, look for well-reviewed brands that focus on beginner-friendly gear.
- Recommended Shops: While prices and availability can vary, here are a few trusted online retailers:
- Bee Equipment Direct
- Betterbee
- Dadant & Sons
Of course, local beekeeping associations often have recommendations as well, and buying local can sometimes give you access to hands-on advice.
Now that you’ve got the gear, how do you actually take care of your bees? Next, we’ll talk about bee health and how to keep your colony thriving through every season.
Bee Health and Hive Management: Keeping Your Bees Happy and Thriving
Now that you’ve set up your hive and have the right equipment, the real work begins: caring for your bees and managing the hive. Healthy bees are productive bees, and your role as a beekeeper is to ensure their environment is safe, clean, and conducive to honey production. Let’s explore the essential practices for maintaining your hive and keeping your bees in top shape.
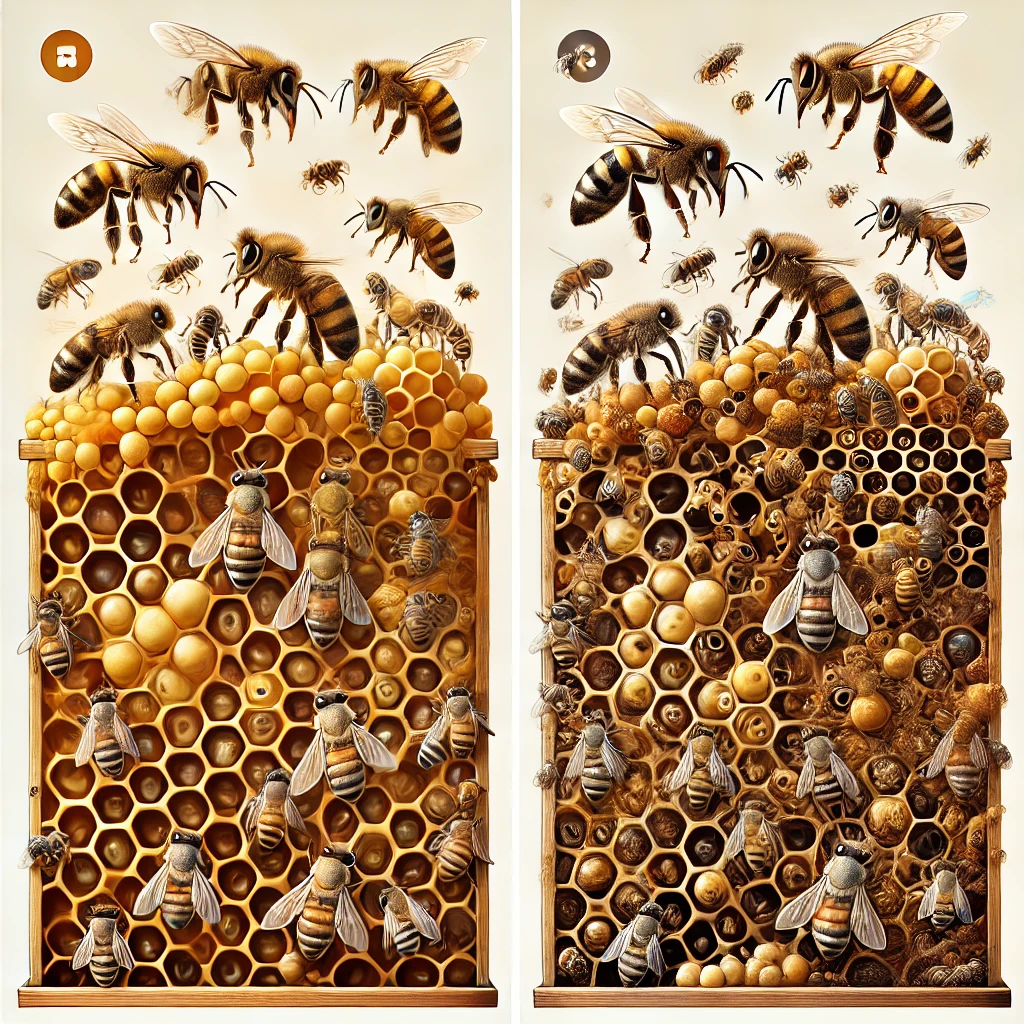
How Do You Know If Your Hive Is Healthy?
A healthy hive is active, organized, and productive. But what exactly should you look for?
- Active Foraging: Healthy bees are constantly coming and going from the hive, collecting nectar and pollen. If you notice little activity during warm weather, it might signal a problem.
- Brood Pattern: Inside the hive, check for a solid brood pattern (where the queen lays her eggs). A good pattern means the queen is healthy and the colony is growing.
- No Signs of Disease: Inspect the bees for unusual behavior or appearance. Sick bees may appear disoriented or sluggish. Also, keep an eye out for pests like Varroa mites.
If you notice any abnormalities, take action early to avoid the problem spreading. A proactive approach to hive management can save you from bigger issues later on.
How Often Should You Check on Your Hive?
It’s tempting to peek into your hive every day, especially when you’re just starting. But frequent inspections can actually stress out your bees. Instead, aim for a balance:
- Weekly in Spring and Summer: These are the busiest seasons for your bees, and regular checks will help you catch any problems early. Look for signs of brood, honey production, and any issues with pests or diseases.
- Monthly in Fall and Winter: As the temperature drops, bees become less active. Your hive will need less attention, but you should still check occasionally to ensure they have enough food and their environment is safe from moisture or cold drafts.
Common Bee Diseases and How to Prevent Them
Unfortunately, bees are prone to various diseases, and one of the biggest challenges for beekeepers is keeping the colony healthy. Here are some common threats and what you can do to prevent them:
- Varroa Mites: These tiny parasites can quickly destroy a hive if left unchecked. Regular monitoring and treatment, such as using mite strips or powdered sugar dusting, are essential.
- Nosema: A fungal infection that affects the bee’s gut, leading to diarrhea and weakened immune systems. Providing clean water and maintaining hive cleanliness can help prevent outbreaks.
- Foulbrood: A bacterial infection that can devastate colonies. Early detection is key, as severe cases require the destruction of infected hives.
Keeping your hive clean, ensuring proper ventilation, and monitoring for signs of trouble will go a long way in preventing disease.
What Should You Do If Your Hive Is Failing?
Even the most experienced beekeepers face challenges. If you notice your hive struggling—whether from a lack of brood, reduced honey production, or low bee numbers—take these steps:
- Check for Pests: Look for mites, ants, or other intruders that could be causing harm.
- Requeen: Sometimes, the problem lies with the queen. If she’s not laying enough eggs or is absent, it might be time to introduce a new queen to your colony.
- Adjust Hive Conditions: Poor ventilation, overcrowding, or even too much space can weaken a colony. Evaluate whether your hive’s setup is contributing to the problem.
If all else fails, connecting with local beekeeping communities can provide insights and advice for troubleshooting.
How to Manage Pests in Your Hive
Bees have plenty of natural enemies, from small pests like Varroa mites to larger threats like skunks and birds. Here’s how to keep your hive safe:
- Install Mouse Guards: These can be added to the hive entrance to keep small animals out.
- Use Mite Treatments: Varroa mites are one of the biggest threats to bees. Regular treatments like oxalic acid vapor or mite strips can keep them at bay.
- Skunk Deterrents: Skunks love to snack on bees. You can install a raised platform for your hive or use motion-activated sprinklers to discourage nighttime visitors.
Do You Need to Feed Your Bees?
In certain seasons—especially fall and winter—your bees may need extra help to survive. While bees store honey for themselves, there are times when you may need to provide supplemental food, such as sugar syrup or pollen patties, to get them through tough seasons.
- When to Feed: Early spring (before flowers bloom) and late fall (after most nectar sources are gone) are the best times to offer food. Avoid feeding during honey flow, as you don’t want sugar syrup mixed with your honey harvest.
Wondering what the next step is once your hive is up and running? Next, we’ll dive into the exciting process of honey harvesting—when to collect, how to do it, and tips to ensure a smooth harvest.
Honey Harvesting: Your First Batch of Sweet Success
Once your bees have worked hard building their colony and producing honey, it’s time for the exciting part: the harvest! Harvesting honey is one of the most rewarding aspects of beekeeping, but it’s crucial to do it at the right time and in the right way to ensure the health of your bees and the quality of the honey.
How Long Does It Take to Harvest Honey from a New Hive?
Patience is key in beekeeping. New hives typically take time to establish themselves before producing honey that can be harvested. In most cases:
- First-Year Hives: Focus on colony growth rather than honey production. It’s common for beginner beekeepers to wait until the second year to harvest significant amounts of honey. This gives the bees time to build a strong foundation and store enough honey for themselves.
- Established Hives: By the second year, your hive should be producing excess honey that you can collect, especially if you’ve ensured they have plenty of nectar sources nearby.
When Is the Best Time to Harvest Honey?
Timing your harvest is essential for both the quality of the honey and the well-being of your bees. Here’s when to know it’s the right time:
- Late Summer/Early Fall: Honey is usually harvested at the end of summer or early fall, after the bees have had time to collect nectar and cap the honey (seal it in combs with wax). Capped honey is a sign that the moisture content is low enough for long-term storage—both for the bees and for you.
- Check the Frames: Before harvesting, inspect your hive’s frames. If at least 80% of the comb is capped with wax, your honey is ready. Uncapped honey has too much moisture and can spoil.
How to Harvest Honey Step-by-Step
While harvesting honey might sound complicated, it’s a straightforward process once you get the hang of it. Here’s how to do it:
- Prepare Your Gear: Make sure you have your protective gear on, your smoker handy, and your hive tool ready to go.
- Use the Smoker: Gently puff some smoke into the hive entrance to calm the bees.
- Remove the Honey Super: The honey super is the top box where your bees store extra honey. Gently remove it and set it aside.
- Take Out the Frames: One by one, remove the frames that are full of capped honey.
- Extract the Honey: Using a honey extractor (a spinning device that removes honey from the comb), place the frames inside and spin them to release the honey. Alternatively, you can use the crush-and-strain method if you don’t have an extractor, though it’s less efficient.
- Strain and Store: Once the honey is extracted, strain it through a fine sieve to remove any debris or wax, and pour it into jars for storage.

What’s the Best Way to Store Your Honey?
Honey is unique because it doesn’t spoil when stored properly. Here’s how to ensure your honey lasts:
- Use Airtight Containers: Store honey in clean, airtight glass jars to keep moisture out. Excess moisture can cause fermentation.
- Room Temperature: Honey should be stored at room temperature. Storing honey in the fridge can cause it to crystallize faster (though it’s still perfectly safe to eat).
- Keep It Dry: Avoid introducing any water into the honey, as even a small amount of moisture can lead to fermentation over time.
Can You Sell the Honey Produced by Your Bees?
If your hive produces more honey than you can use, you might be wondering if you can sell it. The short answer is yes! However, there are a few things to consider:
- Local Regulations: Make sure to check local regulations for selling honey. Some areas may require you to label your honey in a specific way or follow certain food safety guidelines.
- Small-Scale Sales: Farmers’ markets, local grocery stores, or even your own website can be great places to sell your honey. Just be transparent about your practices and ensure your honey is high quality.
Excited to taste your own honey? After the harvest, caring for your bees through the changing seasons is crucial. Next, we’ll discuss how to prepare your hive for fall and winter, ensuring your bees stay healthy year-round.
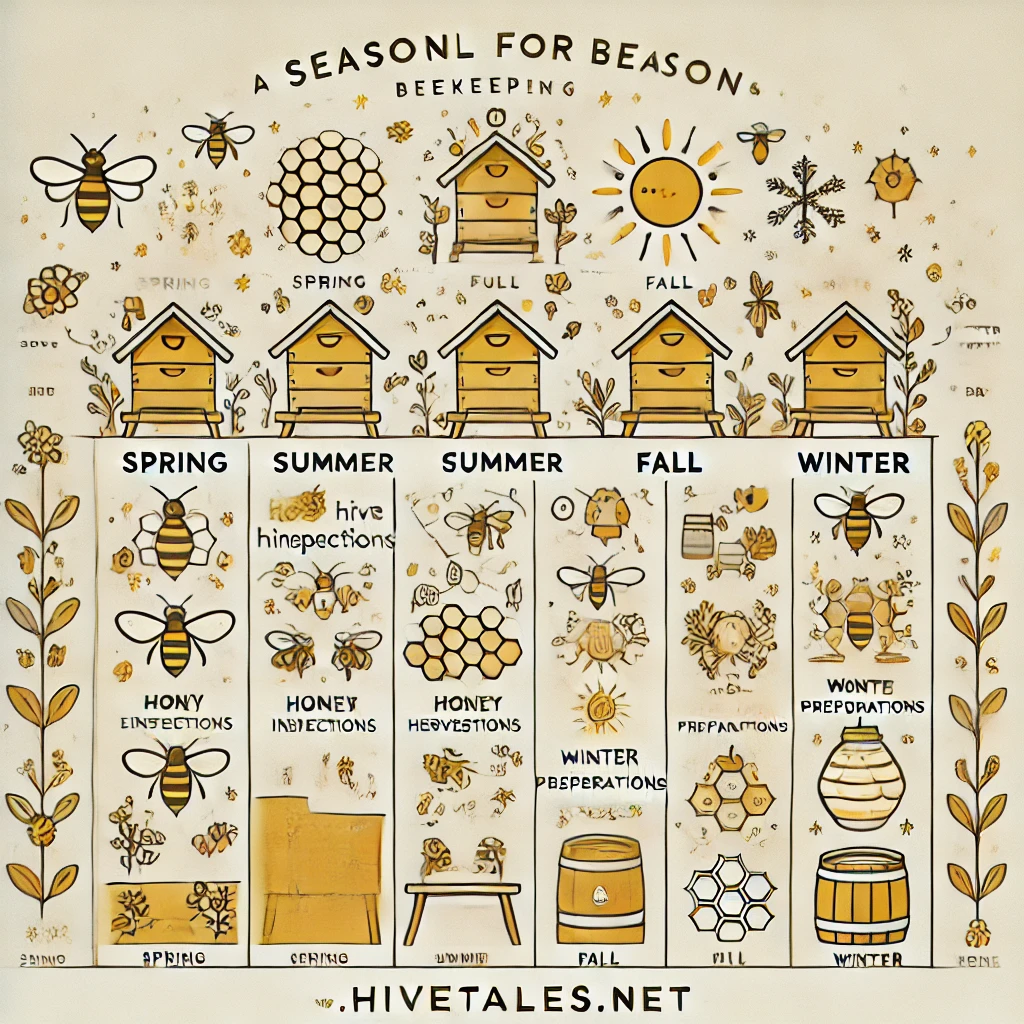
Seasonal Beekeeping: How to Care for Your Hive Year-Round
Beekeeping is a year-round responsibility, and your hive’s needs will change with the seasons. From spring’s bustling activity to winter’s quiet dormancy, knowing how to care for your bees through each stage of the year is essential for keeping your colony healthy and productive.
Spring: The Season of Growth
As the weather warms up, your bees will become more active. Spring is when the hive wakes up from winter, and the queen starts laying eggs to grow the colony.
What to Do in Spring:
- Inspect the Hive: Check for signs of life, ensure the queen is laying, and look for healthy brood patterns. If you see any signs of disease or pests, take action right away.
- Feed Your Bees if Necessary: Early in spring, nectar may still be scarce. If your bees don’t have enough stored honey, you can supplement with sugar syrup until flowers bloom.
- Add Honey Supers: As the colony grows, the bees will need more space to store honey. Add a honey super (a box where bees store honey) to give them room to expand.
Spring is all about giving your bees the support they need to grow and build strength for the upcoming honey flow.
Summer: The Busiest Time for Beekeepers
In summer, your bees are in full swing, gathering nectar and producing honey. This is also the time when you’ll be doing most of your hive management.
What to Do in Summer:
- Monitor the Hive’s Health: Regular hive inspections are a must. Look for signs of swarming (when bees leave to start a new colony), pests like mites, and overall brood health.
- Ensure Proper Ventilation: In hot weather, bees can overheat. Make sure your hive has adequate ventilation and provide a water source if necessary.
- Prepare for Harvest: As summer progresses, check your honey supers. Once the honey is capped, it’s ready to be harvested. However, remember to leave enough honey for your bees to survive through winter.
Fall: Preparing for Winter
As the days get shorter and temperatures cool, your bees will slow down. Fall is the time to help your hive prepare for the cold months ahead.
What to Do in Fall:
- Reduce the Hive Entrance: Install an entrance reducer to help your bees defend against potential invaders like wasps or rodents. A smaller entrance makes it easier for bees to guard the hive.
- Check for Food Stores: Your bees will need enough honey to last them through the winter. If you suspect they don’t have enough, you may need to feed them sugar syrup or other supplements.
- Wrap the Hive: In colder climates, insulating your hive can help protect the bees from freezing temperatures. Use a hive wrap or cover to help retain heat.
Fall is a critical time for ensuring your bees have the resources they need to survive the winter. It’s better to prepare now than scramble when temperatures drop.
Winter: The Quiet Season
Winter may seem like the calmest time for beekeepers, but your bees are still working hard. Inside the hive, they’re huddling together, keeping warm, and eating their stored honey.
What to Do in Winter:
- Monitor from the Outside: Avoid opening the hive during the cold months, but keep an eye on the entrance. Make sure the bees can get in and out for cleansing flights (when bees leave the hive briefly to relieve themselves).
- Check Food Levels: On warmer days, gently lift the hive from the back to gauge its weight. A light hive means the bees are running low on food, and you may need to add a candy board or fondant to sustain them.
- Watch for Moisture: Condensation can be more dangerous to your bees than cold temperatures. Make sure the hive has adequate ventilation to prevent moisture buildup.
While your role as a beekeeper is more hands-off during winter, staying vigilant ensures your bees will make it through the season strong and ready for spring.
How Do You Protect Your Hive from Harsh Weather Conditions?
Each season brings its own weather challenges, from the blazing heat of summer to winter’s freezing temperatures. Here’s how to safeguard your hive throughout the year:
- Shade and Ventilation in Summer: Too much heat can stress your bees, so providing afternoon shade or increasing hive ventilation can help keep them cool.
- Insulation in Winter: Wrapping your hive with an insulating cover or placing it in a sheltered area can help your bees conserve energy as they maintain hive temperature.
- Windbreaks Year-Round: Whether it’s cold winter winds or stormy spring weather, placing your hive behind a natural windbreak (like a hedge or fence) can protect your bees from extreme gusts.
Wondering what challenges you might face as a beginner beekeeper? Next, we’ll explore common mistakes and how to avoid them, ensuring a smooth start to your beekeeping journey.
Common Mistakes Beginner Beekeepers Make (and How to Avoid Them)
Starting your beekeeping journey can be exciting, but like any new hobby, there’s a learning curve. While it’s natural to make mistakes, knowing what to watch out for can help you avoid common pitfalls. Let’s explore some of the most frequent mistakes beginner beekeepers make—and how you can steer clear of them to ensure a successful experience.
1. Opening the Hive Too Often
It’s tempting to check on your bees frequently, especially when you’re just getting started. But too many hive inspections can stress the colony, disrupt their routine, and even reduce honey production.
- How to Avoid It: Aim for regular but spaced-out inspections—once every 7-10 days during the active season is sufficient. The goal is to observe and address issues without disturbing the bees too much.
2. Harvesting Honey Too Early
One of the most exciting parts of beekeeping is harvesting your own honey. However, impatience can lead to harvesting too soon, which might mean uncapped (and unripe) honey. This can spoil quickly due to its high moisture content.
- How to Avoid It: Wait until at least 80% of the honey in the frames is capped with wax. Capped honey is a sign that it’s fully ready and will store well. Remember, leaving enough honey for your bees is crucial for their survival through the winter.
3. Not Providing Enough Ventilation
Bees work hard to regulate the temperature inside the hive, but improper ventilation can lead to moisture buildup—especially in colder months. Excess moisture can be dangerous, causing mold and even threatening the bees’ health.
- How to Avoid It: Ensure your hive has adequate ventilation year-round. In summer, this can help with airflow and cooling, while in winter, it reduces the risk of condensation. Adding a small top entrance or leaving a gap under the hive cover can help with airflow.
4. Ignoring the Queen’s Health
The queen is the heart of the hive, responsible for laying eggs and maintaining the colony’s population. However, beginner beekeepers sometimes overlook signs of a failing queen, which can lead to a weakened or collapsing colony.
- How to Avoid It: During inspections, always check the brood pattern. A healthy queen will lay eggs in a consistent, tight pattern. If you see spotty or irregular brood, it might be time to consider requeening.
5. Underestimating Pest Control
Pests like Varroa mites, ants, and wax moths can wreak havoc on your hive if left unchecked. One of the most common mistakes is not monitoring for pests early enough, allowing infestations to take hold.
- How to Avoid It: Be proactive. Monitor your hive regularly for signs of pests, and consider using treatments like mite strips or natural methods (like powdered sugar dusting) to keep pest populations under control.
6. Failing to Plan for Winter
Many new beekeepers focus heavily on the spring and summer seasons but fail to properly prepare their hives for winter. A lack of food or insulation can result in a colony that’s unable to survive the cold months.
- How to Avoid It: Start planning for winter as early as fall. Check your bees’ honey stores and, if needed, supplement with sugar syrup. Wrapping your hive with an insulating cover or moving it to a sheltered spot can also help protect your bees from freezing temperatures.
7. Not Joining a Beekeeping Community
One of the biggest mistakes beginners make is trying to figure everything out on their own. Beekeeping is a complex hobby, and having a community to share advice, troubleshoot issues, and offer support is invaluable.
- How to Avoid It: Join a local beekeeping club or online community where you can connect with experienced beekeepers. You’ll learn so much from others, and you won’t feel like you’re tackling problems alone.
How to Overcome Common Beekeeping Challenges
Challenges will come your way, no doubt. But each mistake is a learning opportunity, and by staying proactive and informed, you’ll grow as a beekeeper. From managing your hive’s health to knowing when to intervene (and when to step back), the key to success is patience and observation.
Curious about where to get more hands-on guidance? Explore our guides on requeening and hive management, or watch our latest video on how to spot early signs of hive trouble.
Advanced Considerations: Maximizing Your Beekeeping Knowledge
As you gain experience in beekeeping, you may find yourself curious about more advanced topics that can take your skills to the next level. Whether it’s learning how honey can support health or diving into complex hive management practices, there’s always more to discover. Let’s explore some advanced considerations for dedicated beekeepers looking to maximize their knowledge.
Can Honey Be Used to Treat Specific Health Conditions?
You’ve likely heard that honey has been used in natural remedies for centuries. But what does science say about its health benefits? Honey is known for its antibacterial properties and is often used to soothe sore throats, aid digestion, and even promote wound healing.
Research-Backed Uses of Honey:
- Wound Healing: Studies show that medical-grade honey, such as Manuka honey, can help heal wounds and reduce infection.
- Sore Throat Relief: Honey’s natural enzymes can help soothe a sore throat, which is why it’s a common ingredient in teas and home remedies.
- Digestive Health: Some research suggests that honey can support gut health by promoting good bacteria and soothing gastrointestinal discomfort.
That said, it’s important to remember that honey should never be given to infants under one year old due to the risk of botulism.
How Does Honey Interact with Medications or Supplements?
While honey is generally safe to consume, there are a few things to keep in mind, especially if you’re taking medication. Honey may affect blood sugar levels, so people with diabetes should be cautious about how much they consume. It’s always a good idea to consult with a healthcare provider if you’re taking any medications that might interact with sugars or carbohydrates.
Important Notes:
- People on diabetes medication should monitor blood sugar levels when consuming honey.
- Honey may interact with certain digestive supplements, but more research is needed.
Is Honey Suitable for People with Allergies or Sensitivities?
Surprisingly, some people with pollen allergies find that consuming local honey can help reduce their symptoms. The theory is that consuming small amounts of pollen in honey may help build tolerance over time. However, this isn’t a cure-all, and more research is needed to confirm its effectiveness.
Local Honey and Allergies:
While anecdotal evidence suggests it might help, it’s important to note that honey can still contain traces of pollen, which may trigger reactions in some individuals. Always consult with an allergist if you’re unsure.
What Is the Nutritional Composition of Honey?
Honey isn’t just sweet—it’s packed with nutrients that can benefit your health when consumed in moderation.
Key Nutrients in Honey:
- Vitamins: Honey contains small amounts of vitamins such as Vitamin C and B6.
- Minerals: It provides trace minerals like calcium, iron, and magnesium.
- Antioxidants: Honey is rich in antioxidants, which help fight free radicals in the body and may contribute to overall health.
It’s worth noting that the nutrient composition of honey can vary depending on the source of the nectar. Different types of honey, like wildflower or Manuka, may offer unique health benefits based on the plants the bees visited.
What Does the Future of Honey Research Hold?
Honey has been the subject of countless studies, and researchers are still discovering new ways it can benefit our health. In the coming years, we may see more applications of honey in medical treatments, skin care products, and even supplements designed to support gut health or boost the immune system.
Emerging Areas of Research:
- Honey’s Role in Fighting Antibiotic Resistance: Some studies suggest that honey could be used to combat antibiotic-resistant bacteria.
- Honey in Skin Care: The use of honey in beauty products continues to grow, with new research backing its role in moisturizing and healing the skin.
Interested in how honey can improve your daily routine? Read our guide on the health benefits of honey, or explore our latest video on honey’s role in skin care.
How to Start Beekeeping: A Step-by-Step Beginner’s Guide
You’ve read through the essentials of beekeeping, and now it’s time to take the plunge! Getting started in beekeeping can feel a bit overwhelming, but breaking it down into manageable steps makes the process much easier. Whether you’re setting up your first hive in a suburban backyard or on a rural farm, these steps will guide you through the process of starting your own colony.
Step 1: Research Local Regulations
Before diving into beekeeping, it’s important to understand the rules in your area. Many cities, towns, and even rural communities have specific regulations around keeping bees.
- Check for Local Requirements: Look into whether you need a permit, how many hives you’re allowed to keep, and if there are any restrictions on hive placement.
- Join a Local Beekeeping Club: Not only will they help you navigate legal requirements, but they’ll also provide invaluable support from experienced beekeepers.
Step 2: Choose the Right Hive for Your Needs
Once you’ve sorted out the legal details, it’s time to choose the type of hive that works best for you. For beginners, the Langstroth hive is usually the top choice due to its flexibility and ease of use.
- Langstroth Hive: Modular, easy to inspect, and perfect for expanding as your colony grows.
- Top Bar Hive: A more natural beekeeping method but with a slightly steeper learning curve.
- Warre Hive: Requires less intervention but can be more challenging for honey harvesting.
Think about your location, goals (honey production vs. pollination), and your comfort level when selecting your hive type.
Step 3: Find the Perfect Location for Your Hive
Where you place your hive plays a big role in the success of your bees. Look for an area that provides:
- Plenty of Sunlight: Bees thrive in warm, sunny spots.
- Protection from Wind: Position the hive near a natural windbreak like a fence or shrub to prevent excessive exposure.
- Easy Access to Water: Bees need water for cooling the hive and feeding the brood, so a nearby water source (or a shallow dish) is a must.
Make sure the hive is in a spot that’s easy for you to access but far enough from heavy foot traffic to avoid unnecessary disturbances.
Step 4: Get the Right Equipment
Starting beekeeping requires some upfront investment in essential tools, but the right gear will make your job much easier and safer. Here’s a quick checklist of what you’ll need:
- Protective Gear: A full beekeeping suit, gloves, and a veil to protect yourself from stings.
- Smoker: To calm your bees during hive inspections.
- Hive Tool: Used to pry apart boxes and lift frames.
- Bee Brush: For gently moving bees without harming them.
Starting with quality equipment will set you up for success and make your beekeeping experience much more enjoyable.
Step 5: Buy Your Bees
Now that your hive is ready, it’s time to populate it with bees. There are a few options for buying bees:
- Nucleus Colony (Nuc): This is a small, established colony with a queen, workers, and brood. It’s one of the best ways to start as the colony is already functioning.
- Bee Packages: These contain a queen and a group of worker bees. They’ll need time to establish a hive, but it’s a popular option for new beekeepers.
- Catch a Swarm: If you’re feeling adventurous, some experienced beekeepers opt to catch a wild swarm. This requires skill and isn’t recommended for absolute beginners.
Step 6: Install Your Bees into the Hive
Once your bees arrive, installing them into their new home is an exciting moment. Here’s a basic outline of how to do it:
- Calm the Bees: Use your smoker to gently calm the bees before opening the package or nuc.
- Place the Queen in the Hive: In a package, the queen comes in a separate cage. Place her in the hive first, ensuring she is protected until the workers can free her.
- Release the Workers: Gently shake or pour the bees into the hive, being mindful of the queen’s safety.
- Close the Hive: Give the bees time to settle in, and don’t disturb them too much in the first few days.
Step 7: Maintain Your Hive
Now that your bees are settled in, the work of maintaining the hive begins. Regular inspections will help ensure your colony stays healthy and productive:
- Check for Healthy Brood Patterns: Look for a strong, consistent brood pattern as a sign of a healthy queen.
- Monitor for Pests: Keep an eye out for pests like Varroa mites or ants.
- Provide Extra Food if Necessary: In early spring or late fall, you may need to provide your bees with supplemental food like sugar syrup.
Step 8: Plan for Honey Harvesting
Once your hive is well-established, you can start thinking about harvesting honey. But remember, especially in the first year, the priority is the bees’ health and survival.
- Let the Bees Build Up Supplies: Make sure your bees have plenty of honey stored to get them through the winter.
- Harvest at the Right Time: Only harvest honey that is capped (covered with wax), indicating it’s fully matured.
Conclusion: Your Beekeeping Journey Begins Now
You’ve learned the basics, explored the equipment, and even navigated potential challenges—now it’s time to take the next step in your beekeeping journey! Starting beekeeping is a rewarding experience that connects you to nature, helps the environment, and provides the sweet reward of honey. Whether you’re beginning with a single hive or planning to grow a small apiary, the key to success is preparation, patience, and learning as you go.
Key Takeaways for Aspiring Beekeepers:
- Start Small and Learn Gradually: Don’t overwhelm yourself by trying to master everything at once. Start with one or two hives and focus on building your knowledge and confidence.
- Pay Attention to the Seasons: Beekeeping is all about timing. From spring growth to winter preparations, understanding how each season affects your hive will help you keep your bees healthy.
- Regular Maintenance Is Crucial: Stay on top of hive inspections, keep an eye out for pests, and make sure your bees have enough food. Consistency is key to a thriving hive.
- Join a Community: Beekeeping can be complex, and having access to local or online beekeeping communities is a great way to troubleshoot problems, share experiences, and learn new techniques.
Your Next Steps
If you’re ready to jump into beekeeping, now is the perfect time to start preparing! As a beginner, you’ll face a few challenges, but each one is an opportunity to learn and grow as a beekeeper. Over time, you’ll find yourself more attuned to your bees’ needs and more confident in managing your hive.
For additional resources, check out our comprehensive articles on:
- Hive Management: Best practices for inspecting, maintaining, and expanding your hive.
- Honey Harvesting: Step-by-step instructions for collecting honey and keeping your bees healthy.
Final Words
Beekeeping isn’t just a hobby—it’s a chance to contribute to your local ecosystem while enjoying the natural benefits that bees provide. So, whether you’re in it for the honey or simply to help the bees, your journey begins now. And remember, you’re never alone in this adventure—there’s a whole community of beekeepers ready to support you along the way.
Ready to start beekeeping? Explore our latest videos on hive setup and honey harvesting for hands-on advice, or Subscribe for more beekeeping tips delivered right to your inbox!
References
- Penn State Extension – “Beekeeping Basics”
This guide provides comprehensive information on starting beekeeping, including bee biology, colony management, handling diseases, and equipment essentials. It’s an excellent resource for new beekeepers and covers everything from the organization of a bee colony to honey production, pollination, and managing common pests and diseases.
Beekeeping Basics – Penn State Extension - Missouri University Extension – “Beekeeping Tips for Beginners”
This article offers beginner-friendly guidance on starting a hive, installing bees, and managing the colony throughout the seasons. It also covers various aspects of hive management, honey harvesting, and practical pest control methods. The Missouri University Extension provides detailed, actionable steps for those new to beekeeping, making it a highly credible reference.
Beekeeping Tips for Beginners – MU Extension